


Anime is a style of animation popular in Japanese films and television, but I guess if you’re reading this article then you probably already know that! However, for the uninitiated, let’s have a brief look at how Anime started and how its popularity has risen to where it is today.
Modern anime began in 1956 and found lasting success in 1961 with the establishment of Mushi Productions by Osamu Tezuka. He was a leading figure in modern Manga and the novelistic style of the genre contributed greatly to the overall look and style of Anime.
The first Anime films were predominantly aimed at children and within the Japanese market. As a result, a lot of the themes involved related specifically to Japanese culture and therefore may not have appealed to a wider, global audience.
Probably the most instantly noticeable feature of an Anime character is the large eyes which in Japanese culture are considered windows to the soul. Things like this and some of the general storylines may have originally been confusing to the western filmgoer more used to bright colors and the fairytale stories produced by Disney. That being said, the majority of Anime films were and are written produced in the style of Japanese folktales, so the similarities began to take shape.
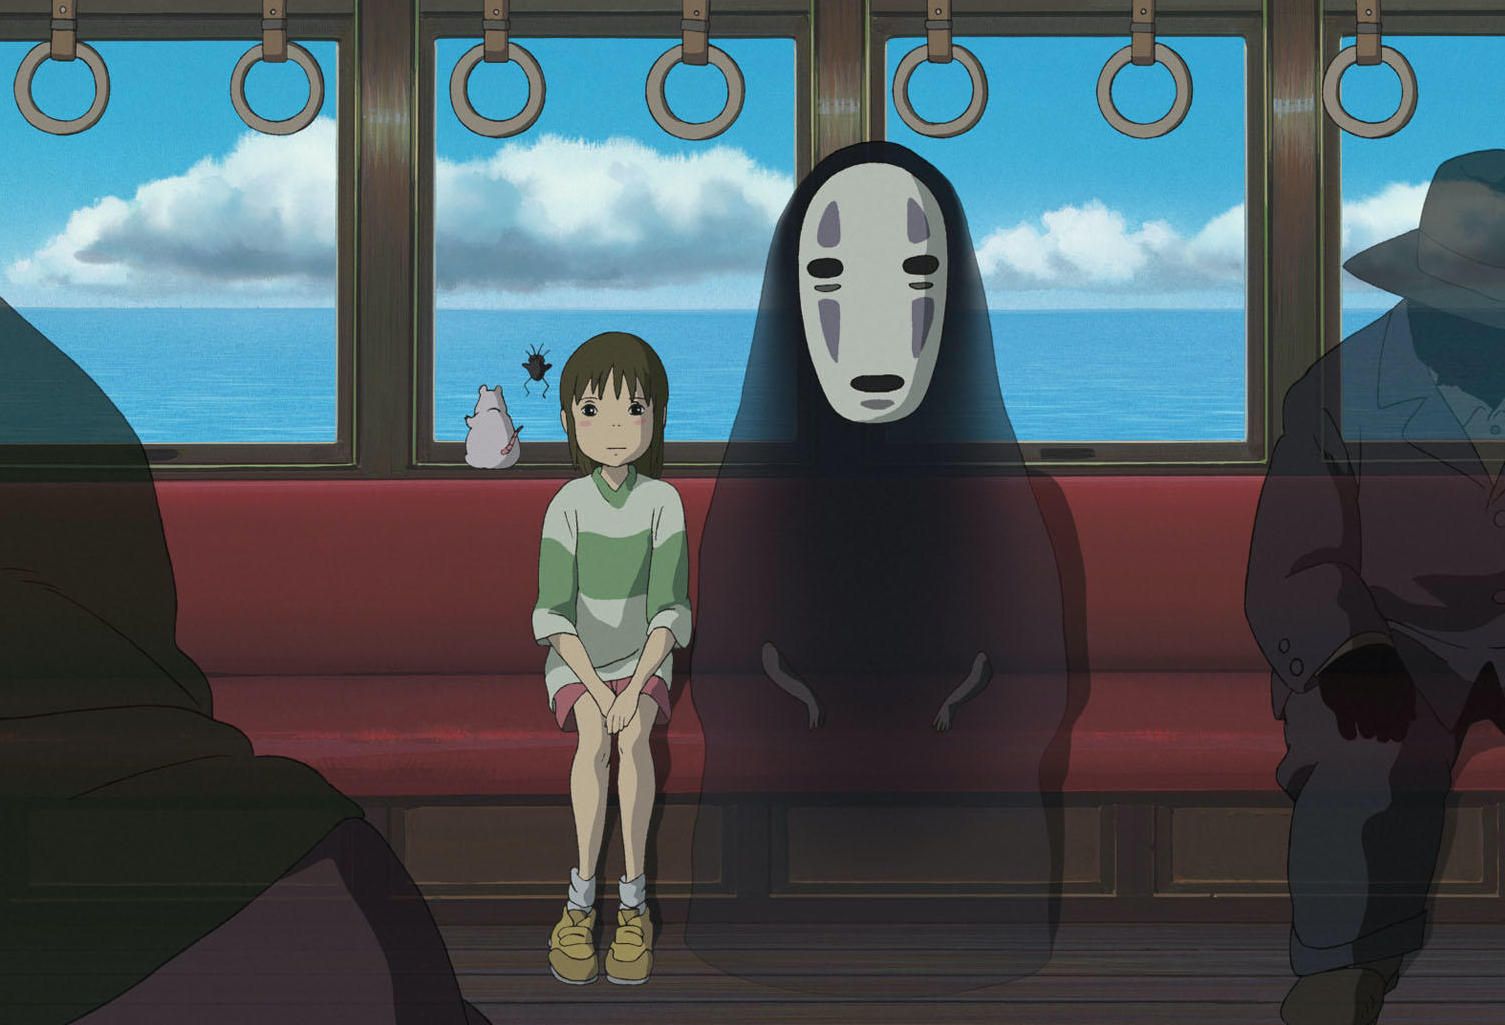
Anime such as Miyazaki Hayao’s Princess Mononoke (1997) are the modern equivalent of these epic folk adventures. At the turn of the 21st century, anime began to attain wide international popularity with the Pokémon television series and films such as Miyazaki’s Spirited Away (2002), which was one of the first recipients of the Academy Award for best animated feature film.
The success of Miyazaki’s Studio Ghibli production company paved the way for even more mainstream exposure to Anime in its purest form with 20+ films and a multitude of other shorts, TV spots and even stage productions. Their contribution to the mass appeal of Anime should not be underestimated.
So, that’s just a brief look at how Anime came to be but now let’s move onto our topic of discussion; 3D printed Anime figures.
Anime Figures
With any popular culture phenomenon, there is the inevitable merchandise. This is a very lucrative market for film and toy producers and fans want to show their love of something by having a physical representation to display or play with. At one time, film and TV merchandising wasn’t considered to be worth the cost to return ratio. How wrong they were though! This was famously borne out by 20thCentury Fox’s release of all Star Wars merchandising rights to George Lucas back in the 1970s. Lucas is now a billionaire and the rest, as they say, is history.
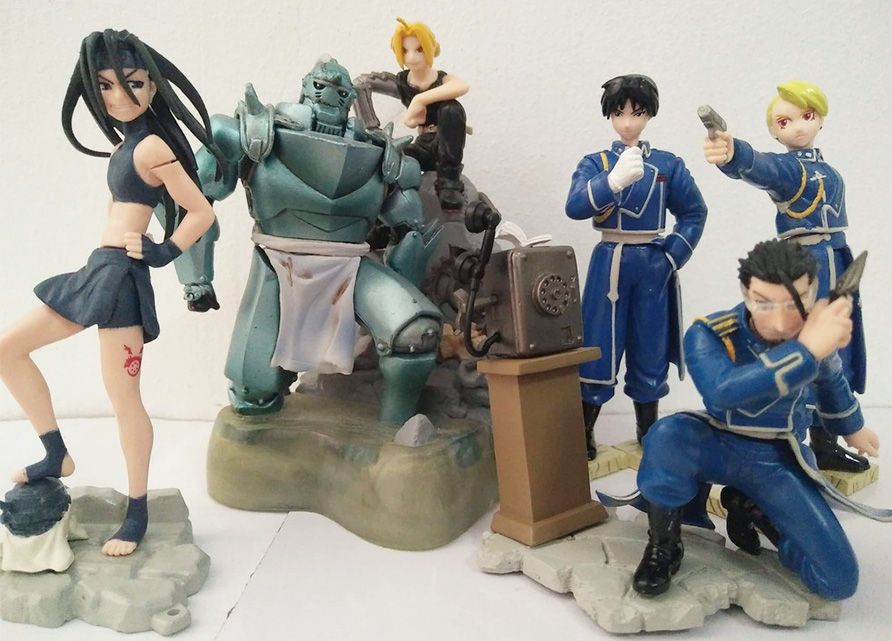
The main issue with merchandise and in particular display figures is the cost. Posable action figures can start at the $20 mark and keep rising. If we’re talking about collectible or limited-edition display figures, then don’t expect much change from at least $100. Unless your resources are unlimited, you’re going to find it hard to keep up with new releases of figures and to build a collection you can be proud of.
This is the exact reason why I got into 3D printing. I’m a collector of anything to do with film and TV and have a particular passion for Anime, Star Wars, Super Mario and Marvel among a lot of other things! My collection, if displayed fully, would fill my house but I’ve limited it to my office and spare bedroom. The rest is in storage...for now!
The other issue I was having was the cost of these items. I’m not particularly bothered about the value something might attract if I were to sell it; I want to surround myself with figures and display pieces that will bring me joy. That’s when I thought “I could 3D print that” and haven’t looked back.
There are a multitude of Anime characters across the genre and in turn, they’re likely to have a physical figure or model available. This is where you can beat the system by creating and 3D printing your own. The ability to do this will give you something unique and also allow you to build your collection much faster.
So, I’m aware that some of you will already be familiar with 3D printing and producing figures and other items. Let’s for now though pretend that we’re all just starting out on this journey and look at all the stages you need to go through to get that Anime figure in your display cabinet.
Designing your figure
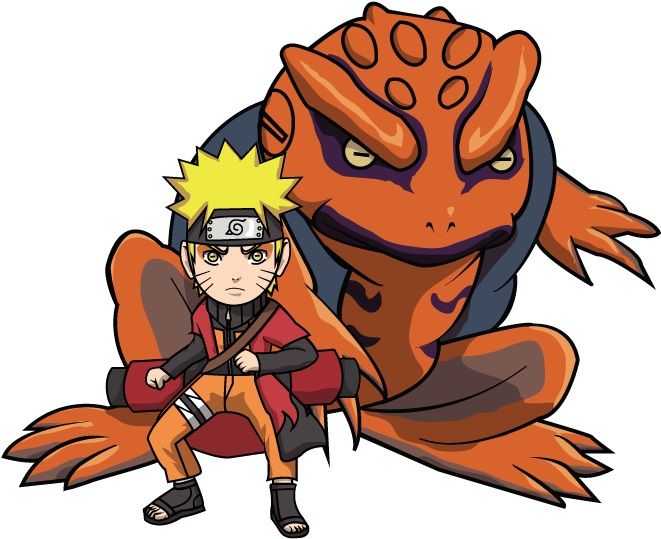
The first thing you need to consider is what character you want to print first. As I’ve said, there are a multitude of choices out there but for the purposes of this tutorial, we’ll go with Naruto Uzumaki, the titular character from Masashi Kishimoto’s original comic book and Anime TV series.
Now, you could go straight in at the deep end and use a 3D design program to create your figure. This of course will create something that is definitely unique but will need a lot of design expertise and knowledge of the software you’re using. As we’re considering ourselves as complete beginners, it may be easier to find a design we like and convert it into a 3D printable model.
The best way to find pre-designed 3D models is to look in a 3D repository and the most well-known of these is Thingiverse. There are several other sites such as Cultsor MyMiniFactory offering models but quite often you have to pay to download the file. The advantage of using Thingiverse is that all downloads are free but you do have the option to “tip” the designer if you wish.
Downloading your file
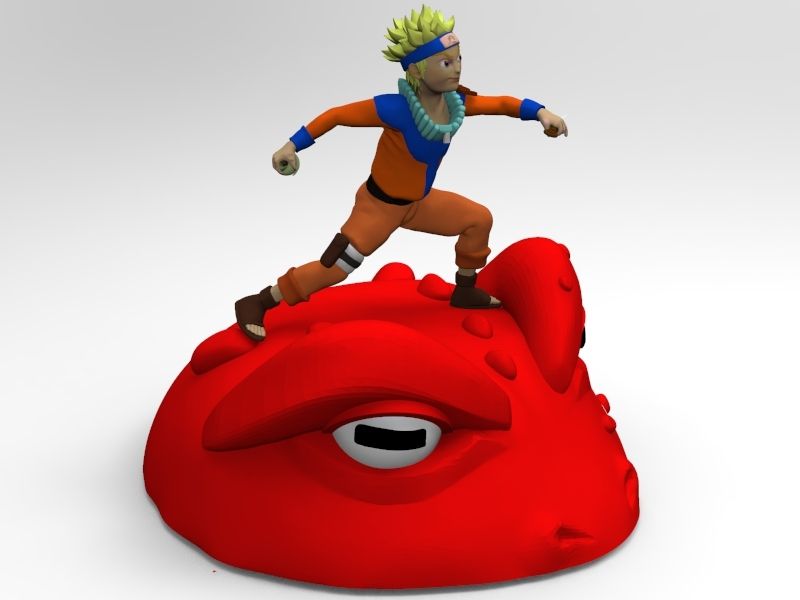
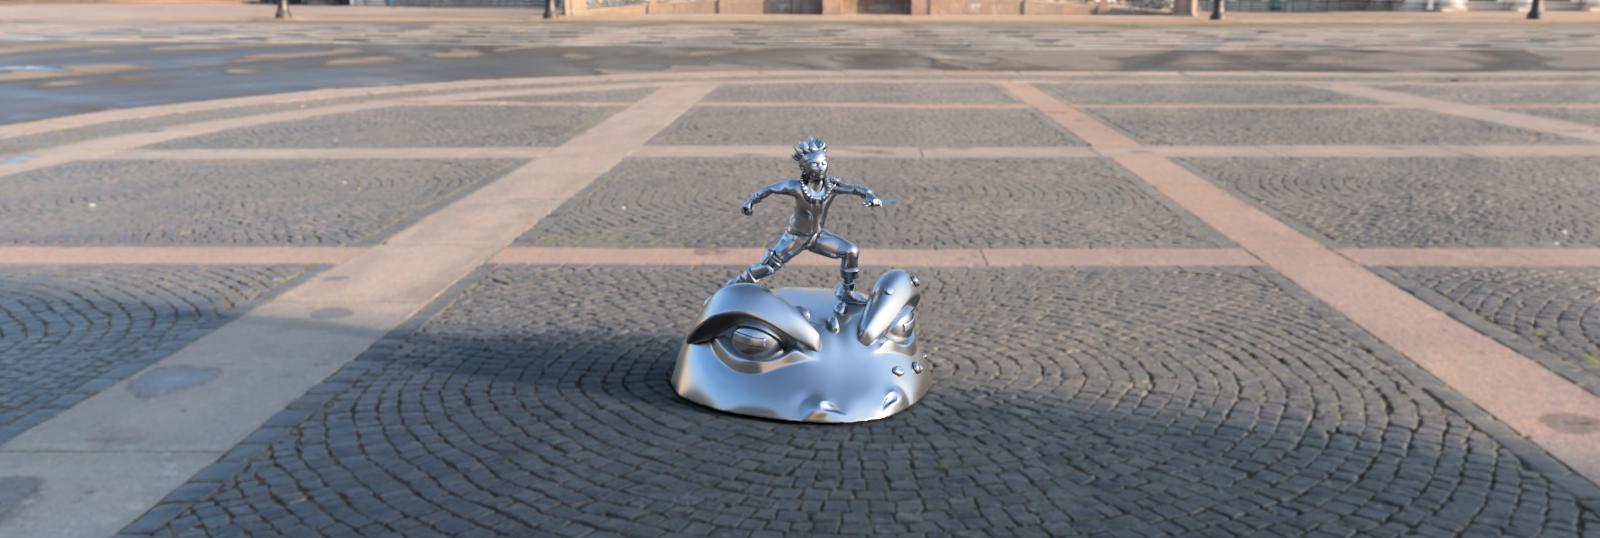
Under normal circumstances you’d be searching on Thingiverse using the keyword “Naruto” and would be presented with several different items, although not all would be figures. In this case, I’ve done the hard work for you and have found this great looking figure by designer Jaimerioco which shows Naruto atop Gamakichi’s head.
The first thing then is simple enough; download the file onto your PC. Save it somewhere like “3D print files” and name it what you like. Naruto makes perfect sense though! With this model there is the option to download the file as a single, printable item or there are three separate files for different model components. Each will give you the same model but with the assembly option, you may be able to print a larger version of the completed figure.
Preparing for printing
The file you’ve downloaded won’t however be ready to print straight away without some magic dust in the form of a slicer program. In 3D printing terms, a slicer is a piece of software which allows you to set certain parameters for your 3D printer to get the best resultant print.
The design of this model is ideally suited to an FDM (Fused Deposition Modelling) 3D printer so I would always suggest using the slicer Cura in such cases. Cura is the go-to slicer for 3D printing, particularly for FDM, and is free and pretty easy to use.
All you need to do is download the latest version of Cura and install it on your PC. Then you can select your model file to import to Cura and voila! you should see it appear on the screen.
Setting the parameters
As I’ve said, to get the best results from your print, you need to set certain parameters to make sure you don’t end up with a hot mess on your print bed!
The first thing to look at is the profile of your particular printer. There are literally hundreds of different FDM printers on the market today and, although they all use the same basic printing principles, there are significant differences.
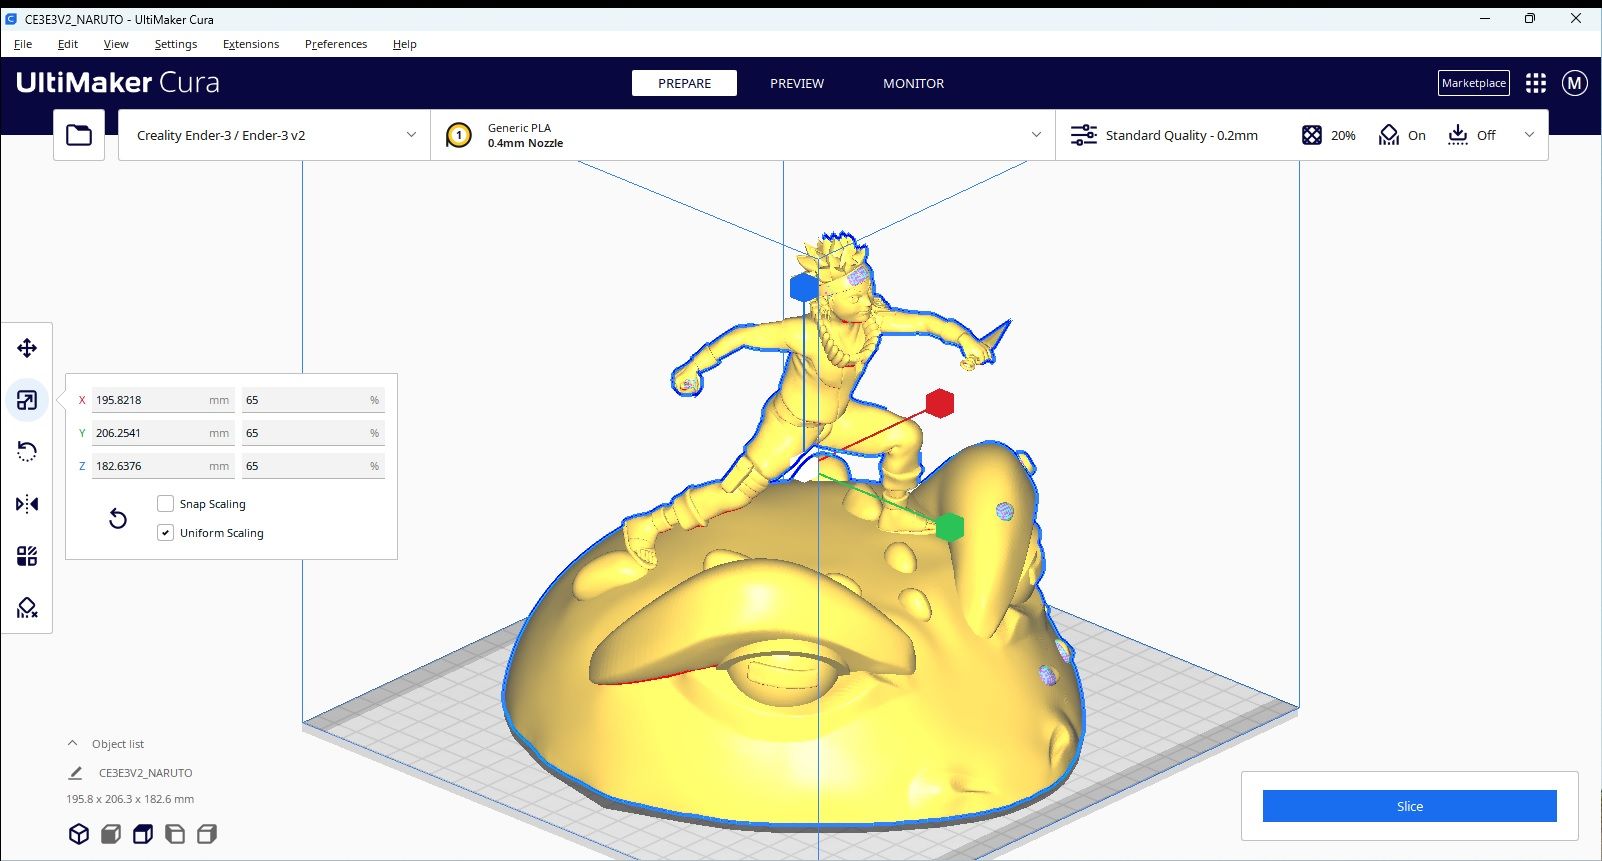
If you open up Cura you’ll be presented with the UI (User Interface) where you’ll see a digital representation of a printer. This may however not be your particular model so you need to select the correct one from the dropdown toolbar. I own several FDM printers but favor Creality and their Ender 3 range of machines. I therefore would be able to select the Creality Ender 3 V2 from the list and all the presets for that machine will be loaded.
There are then a few things that you need to do but a lot more that you could do. Let’s though stick to the basics for now and just consider what we need to get our chosen model printed.
So, the basic parameters you need to set are:
· Scale: This model is of a pretty good size, but in its original format its too big for the Ender 3. You can increase or reduce the size according to your needs so in this case I decreased the size of the model to 60%. To be able to scale a model up or down is a good option if you use the separate files and print them one at a time
· Rotation: Getting the right orientation for your model is key in avoiding unnecessary supports and therefore wasted time and filament. This model has a large base so it makes sense to have that as touching the build plate
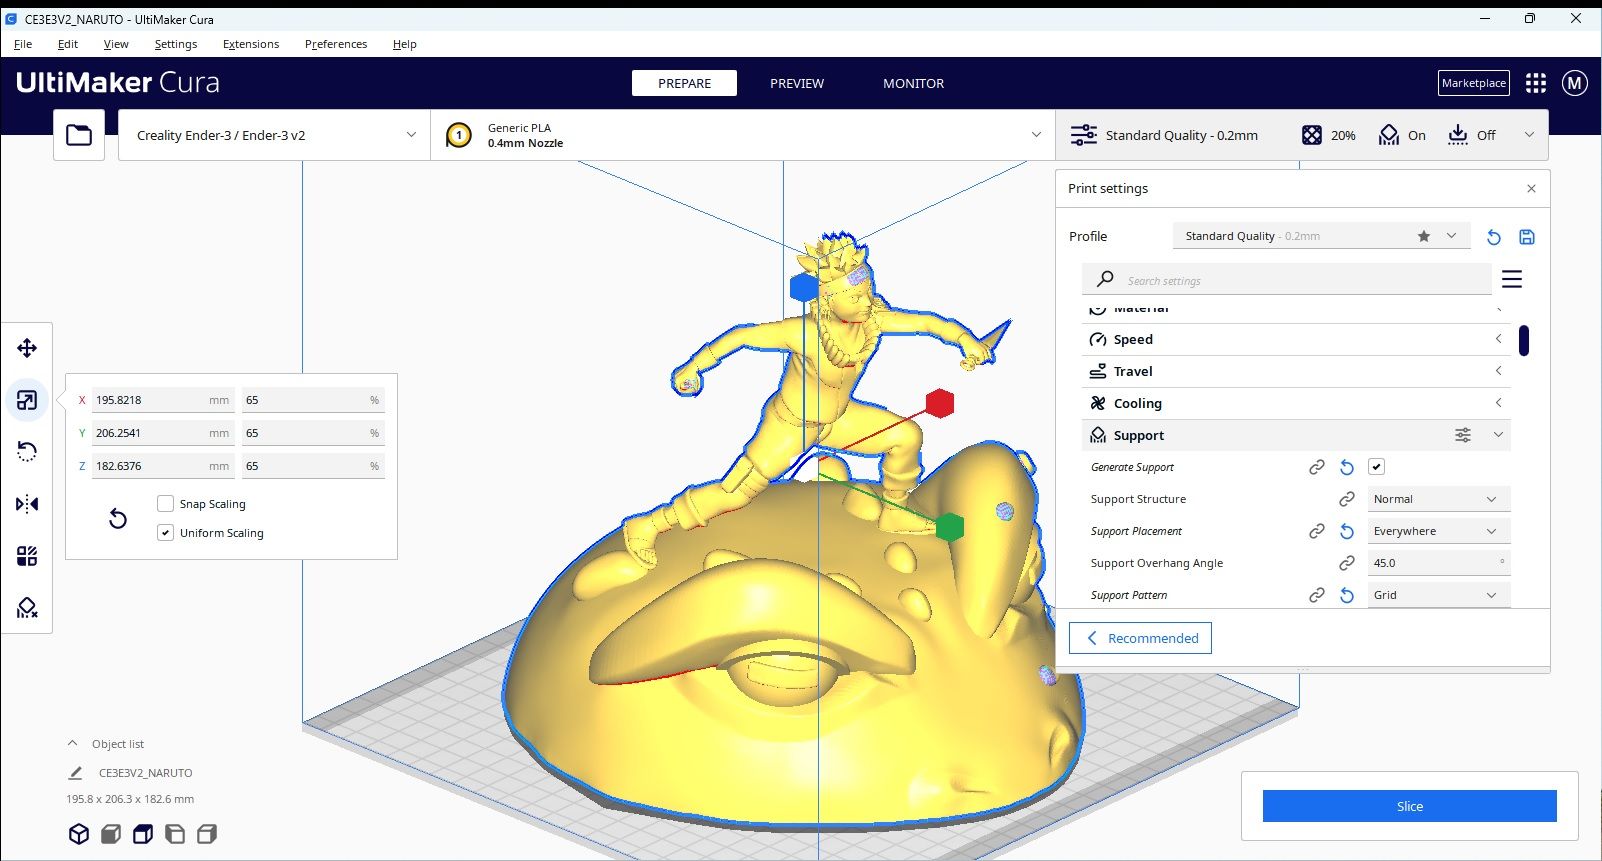
· Supports: You can set supports to cover any area that you think may need them. If you want to go into minute detail with the supportsthen you can but the basic settings are there to help you. This model will need supports for Naruto’s arms and possibly his legs. Just set the supports to generate “everywhere” and they will automatically be placed where needed
· Infill: This determines how solid your model will be but as it’s just for display, a setting of 20% is more than adequate. You can also change the infill pattern, but I usually go for a grid
· Temperature: This relates to the printer nozzle and heated print bed. Depending on which filament material you use this will be advised by the manufacturer and usually displayed clearly on the filament spool. As a guide, PLA is the most commonly used filament and my settings for this are usually 200°C for the nozzle and 55°C for the bed
· Layer height: The smaller the layer height the smoother your print will be. It will, however, add more time to the print but quality may be worth it. Trial and error is the key for this setting
· Speed: The print speed is important and again will affect the quality of the print. Your printer will have a maximum speed but don’t use that as a target! I usually go for a slower speed for the first few layers (30-40 mm/s) and then ramp it up to about 80 mm/s for the rest of the print
· Build plate adhesion: This is important if you have a more delicate model or one that’s tall and thin. In such cases, you’d need to go for a “raft” adhesion setting. With this model, a simple “brim” will suffice
As you can see, there are quite a few things you can control which will affect your model. These are just the basics but once you become more proficient, you’ll be able to delve into the more advanced settings.
Slicing...but not dicing!
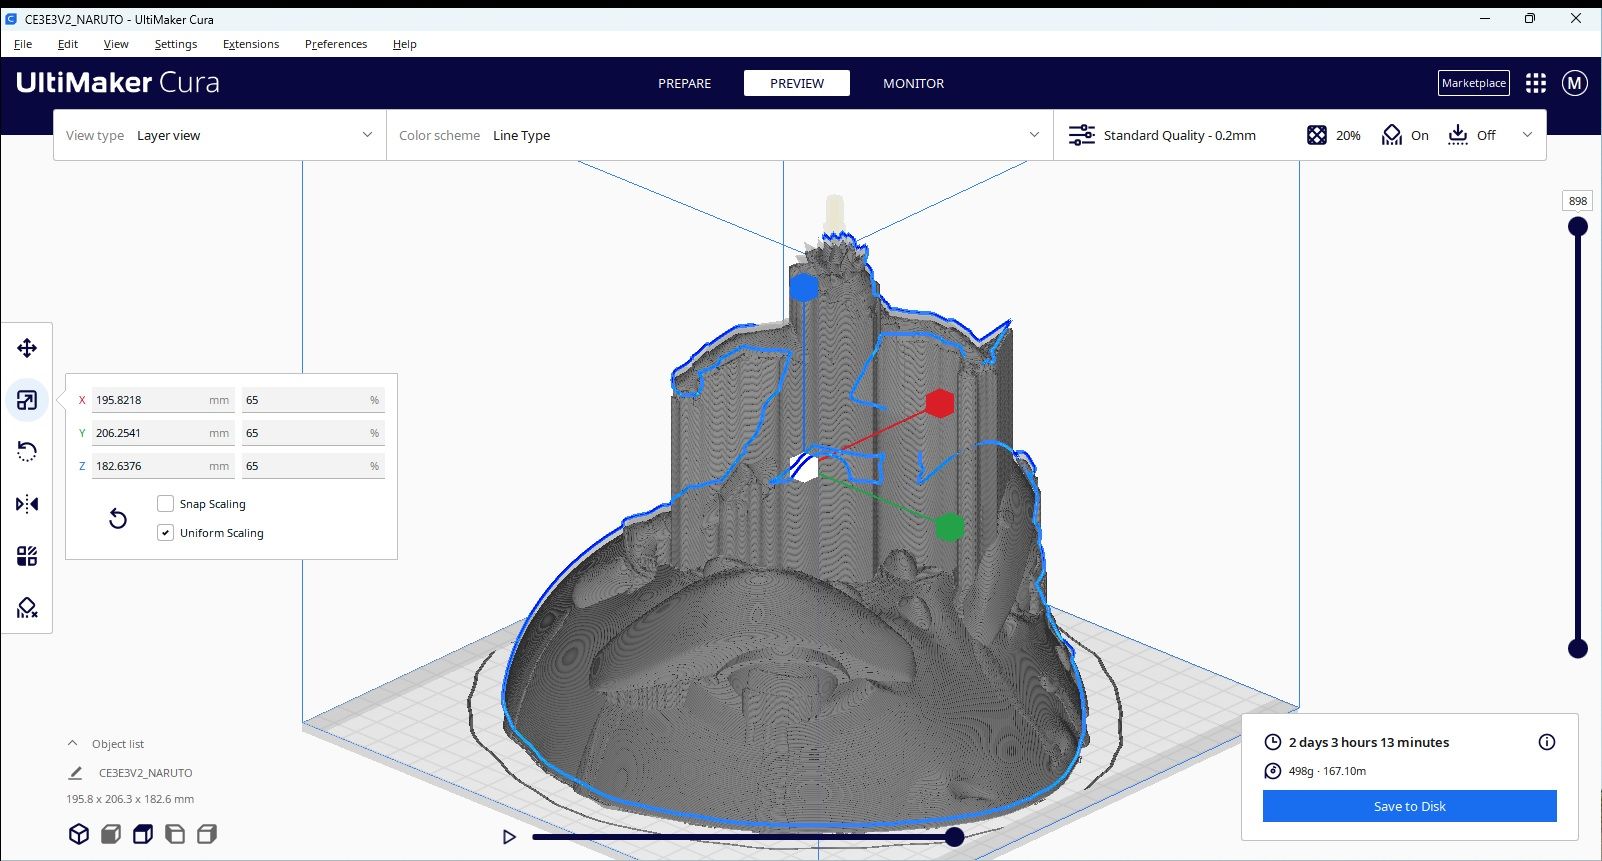
The model file is now ready to slice and this is done by simply clicking on the “Slice” button in the bottom right of your screen. The process starts and may take a little while but once done, you can save it to your same “Naruto” folder ready to be printed.
Once sliced, Cura will give you an estimated print time and filament usage guide. These aren’t necessarily accurate but act as a good guideline, so you know what to expect. In this case, you’ll see from the image that the print is likely to take more than two days! Don’t be too alarmed though as this is a large model and I’ve set the quality and supports etc. to a fairly high level. You can play around with the settings in Cura which will reduce estimated print times but remember that this will also change the quality of your print.
Printing
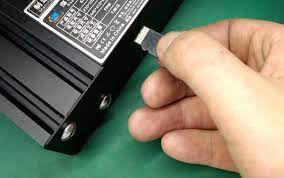
Most 3D printers will have a slot for an SD or Micro SD card, so the next step is to transfer your sliced file onto the card. Make sure to format it to “FAT 32” first and ensure there is nothing else on the card. It should then just be a case of inserting the card into your printer and following the instructions on how to print with your machine.
With my Creality printers, there is the option to use wi-fi to transfer your files to the printer, but I won’t go into detail about how to do that as it in itself is a lengthy setup process.
You’ll notice from the image that Cuar provides you with a preview of the print with the supports in place. These will obviously need to be carefully removed prior to sanding and painting.
The Finished Article!
So, hopefully you’ve done everything correctly and your 3D printer has produced a perfect model of Naruto and Gamakichi. Don’t worry though if everything isn’t perfect as quite often, you’ll need to do some post-processing to get the finished effect. This may involve sanding and filling but hopefully not too much.
The next and final stage would be to paint the model, and this should be done by applying an acrylic primer first and then using colored acrylics to finish the paint job. Add a final coat of clear lacquer (a matt finish gives the best results) and you’re done!
The choice is yours
As I’ve said, this is just one example of the thousands of Anime model files you’ll find online. Which one(s) you choose is down to you and what your Anime fandom is.
Downloading files from other designers is a great way to start your 3D printing journey and will give you fast results. However, to really make something unique and that you can be proud of, trying 3D design software is the next step up.
Whichever you choose, enjoy 3D printing and show everyone that you’re an Anime fan.


Member discussion